Wednesday 15 February 2017

Painting the runners and chocks

The metal work on runners and chocks is now ready! Final thing before assembly is painting. High gloss black aerosol paint (rattle can spray paint) is used. The parts are sanded and wiped of with acetone before applying paint.

Chocks ready for paint.


Chocks painted.


The sharpened edges on the runners are covered with tape during painting.


Ready!


Friday 27 January 2017

Runner bags.

Now the runners have been sharpened I wanted to protect them from getting damaged! This resulted in a small side project making runner bags.

I started with buying an ordinary padded ski bag. The zipper needs to have two zipper heads so that when the bag is cut in two you end up with two bags with functioning zippers.


Unnecessary stuff is cut of and markings made where the bag will be sewed together.


The plan was to use a sewing machine to sew the bag ends together but the padded material was too thick.


So I ended up sewing by hand!


When the ends where sewed up the middle part was cut away resulting in two bags.


Handles where sewed to the bags with the sewing machine. I should have changed to a black sewing thread...


Runners in safe storage waiting for further refining.


Sharpening the runners.


 I was able to arrange so I could use one of the local sailing clubs runner sharpening machine!

This is what she looks like! I rigged the machine back on my trailer so the sharpening was done outside.


There are quite a few possibilities for adjustments. From runner point of view the angle is the most important. Pre adjusted to choose from is 100 degrees and 90 degrees angle. 


Ready to begin. First up is the front runner. I started with 60 grit sand paper and finished with 120 grit paper .


Quite a lot of material is removed. This is after first runner is sharpened.


Ready!


Below an attempt to show the how the runner is sharpened in a 90 degrees angle. My apologies for poor picture quality.


Back at home some oil was applied to the sharpened surface to prevent it from rusting.


Sunday 8 January 2017

Building the chocks.

Beginning to build the chocks. Cutting the parts needed.


Most of the holes drilled. 


Preparing welding.


Same procedure for front runner.


Welding outside in -10 degrees Celsius.


Front runner chock is still missing the "arms" to fasten steering lines in and hole for steering shaft. 

Rear chocks are basically ready. I'm still considering if I should build a bracket that would grab around the plank. The idea is that it would take up the sideways forces on chock during sailing helping to keep runners in parallel. Alternative is to have  a turnbuckle connected between plank and rear chocks this would also allow some adjustment if parallel alignment between runners is off.


This was how I planned to attach steering line arms  originally but the steering radius would become to big as the arms hit the springboard limiting the steering too much.


Determining how much the runner is able to turn before hitting the chock. The front runner is able to turn around its axis a a little bit more than 20 degrees (+- 10 degrees from level) in total and the rear runners about 17 degrees. Building instruction says that runners should be able to turn around their axis between 10 and 20 degrees so I guess this is OK.


Steering arms still not welded.


Wednesday 4 January 2017

Front runner.

Front runner was basically made in same way as the rear runners! Location of shaft hole is a bit different and no stiffeners should be needed.


"Designing" the parking break that will be on the front runner.


Thursday 24 November 2016

Rear runners in the making.

After a couple of more trips to the scrap yard this is what I ended up with! Two flat iron bars. The wider one is 90 x 6 mm and will be used for blades and the other one is 30 X 5 mm and will be used for stiffeners. I would have liked to have gotten a higher flat bar for the blades for example 130 x 6 mm but that was not available. These runners wont allow much snow on the ice! Normal carbon steel is used. Stainless steel would be easier to maintain. I have read or heard that the frictional coefficient for carbon steel on ice would be lower than for stainless steel on ice. Although not confirmed I hope it is true since it should make the boat faster.


I started by cutting the bar in correct length (600 mm).


Next step was to shape the blade. The instructions state that blade should have a curve of 2 mm on a length of  400 mm measured from below the bolt of runner. I achieve this by taking of material of the blades with a belt sander with 40 grit sand paper.


Both runners were shaped at the same time.


Every now and then I checked the measures until I was satisfied. 


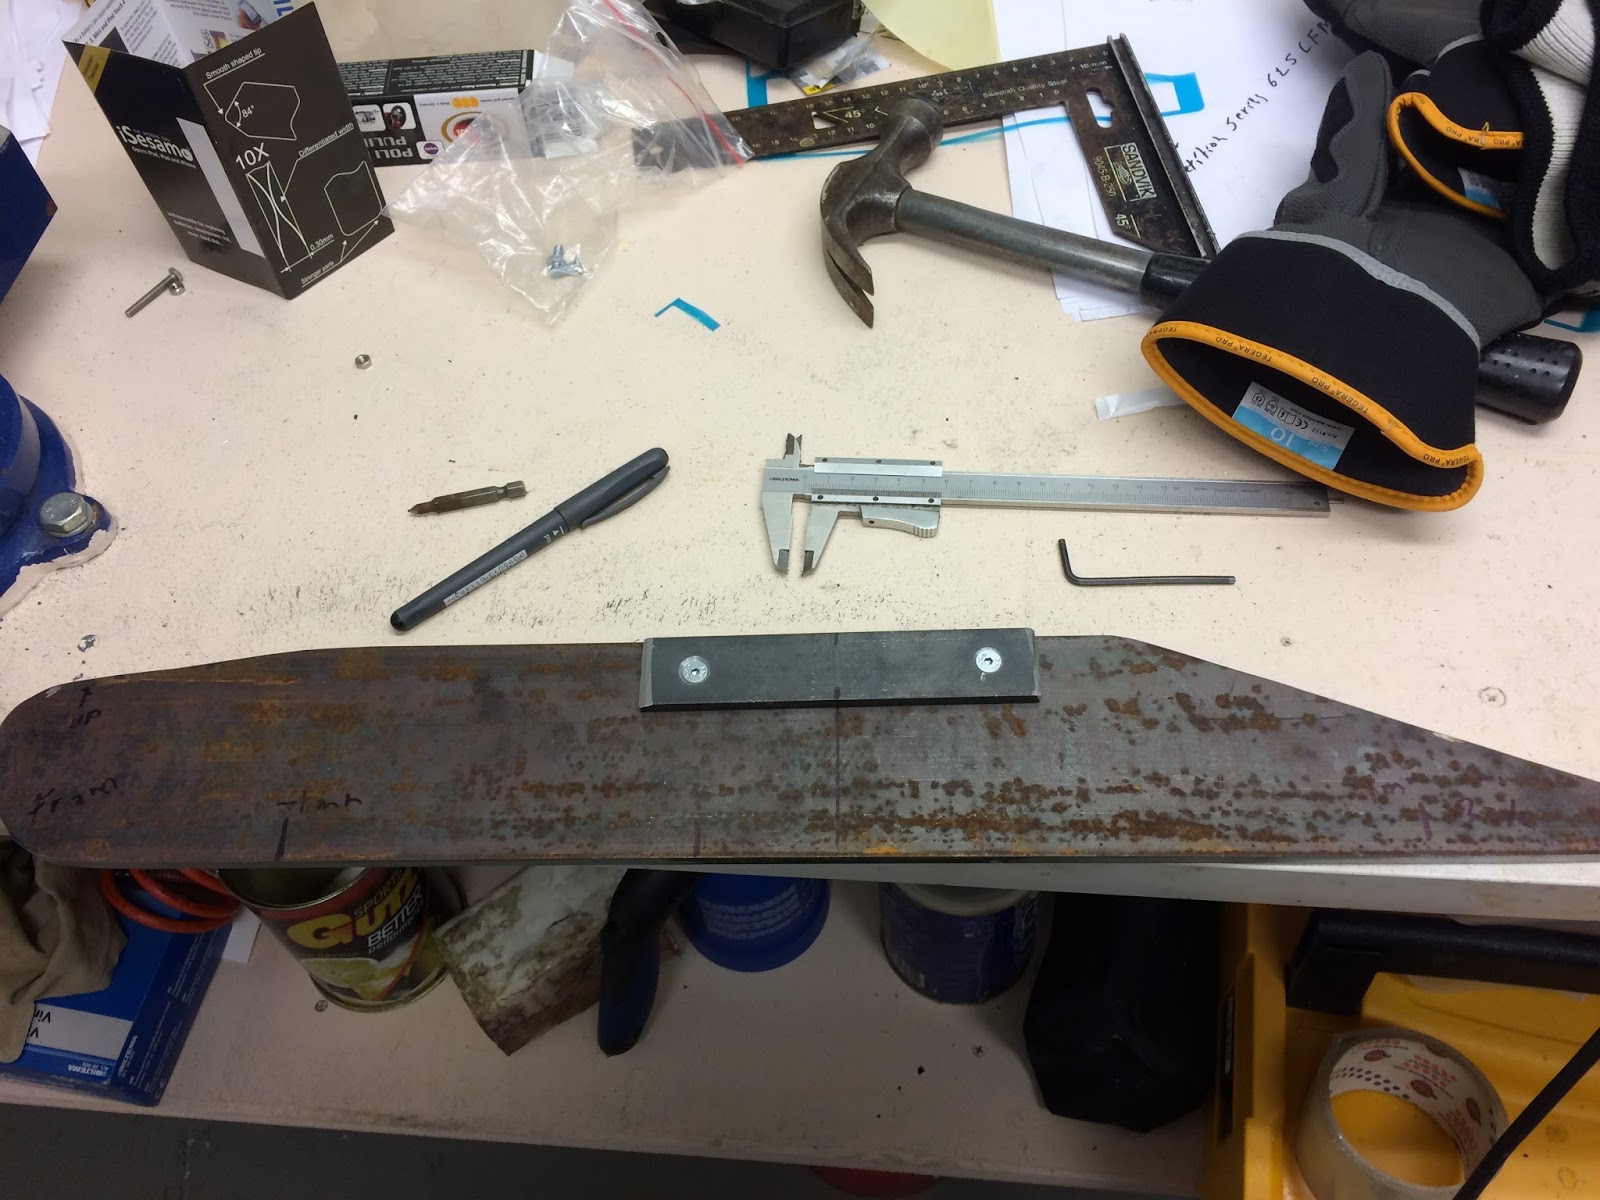
I made a small deviation from building instructions by leaving a 10 cm part straight below where the fastening bolt will come on the blade. This is how I know some of the DN sailors shape their runners when they sharpen them! Also good to point out here is that I'm only shaping the curve of the blade to desired shape now. The blade still has to be sharpened before it is ready.


Stiffeners. These are there for strengthening the blade in side ways. If and when the boat tips up on two runners during sailing due to strong winds, the sideways force on forward part of the rear runner still on the ice might become so big that it bends the blade if no stiffeners are used. 


I'm using a bolt joint to fasten the stiffeners. Here I'm making M5 threads in one of the stiffeners and the other side will have counter sunk bolt head.


Like this!


Assembled.


The rear runners are now ready for sharpening. That will however be explained in a separate post later on!