Thursday 14 April 2016

Spring is in the air.

During the last two weeks most of the ice in the  archipelago where I live has disappeared! I had hoped to get the ice boat ready in time to atleast have a first test on spring ice but as always with projects like this they tend to take longer than expected. On the other hand spring ice conditions this year would not have allowed ice sailing any way.

Even if I consider the ambition level of the build to be fairly low quite some time has been spent. A rough estimate of time spent so far is somewhere around 40 hours.

The next step is to start building runner shocks and runners. I have come to a milestone and therefore it feels like a good idea to take a break from the build now before starting on the metal work.

Below some pictures of what the boat looks like now.


Friday 1 April 2016

Miscellaneous tasks.

Lately I have been working mostly on finishing miscellaneous details.

In the last post I made the runner plank fastening arrangement to the hull. Also the runner plank needs some modifications in order to stay put once fastened to the hull. Stop blocks to keep the plank in place in sideways direction under fabrication.

Runner plank stop blocks glued and screwed.


Varnish applied to runner plank.


From an earlier project some grip tejp was left over. 


Backrest fastening with stainless steel hinges.


Backrest folded down.


Springboard fastening.


Measuring so that everything is straight.


When all is lined up the holes for fastening bolts are drilled thru the spring board.


Springboard bolted to the hull with M8 bolts.


Sunday 6 March 2016

Runner plank fastening.

The last weeks have been a bit slow when it comes to the ice boat build. One reason for slow progress is that the family visited a ski resort for a couple of days.

When this picture was taken the weather was perfect! Only a couple of degrees below zero almost no wind and sun shining from a clear blue sky. Perfect conditions for down hill skiing! When it comes to outdoor activities regardless if it is summer or winter activities they are always to some extent relying on the weather. Ice boating is no exception and when it comes to being weather sensitive ice boat sailing must be one of the worst. You need both ice and wind conditions to be good to enable sailing. Not to mention that you need to have the day off when the conditions are favorable.


Back to the topic some small progress has been made on the boat also.

In the plans for the Isabellakiss iceboat the runner plank fastening is with straps. I will try a similar fastening arrangement.


Location of the front side of runner plank measured and marked. Fixing blocks made to fix the plank in correct place.


Holes for the straps being made.


The fixing blocks were glued and screwed to the hull.


The bottom of the hull was left un coated earlier. But now all wood work on the hull is ready and varnish can be applied to the bottom also.

Sunday 14 February 2016

Surface treatment.


I have chosen to varnish the iceboat. I'm using a one component clear high gloss varnish that I apply with a brush. There are several reasons for me choosing this surface treatment. To begin with I like the looks of varnished wood, but it is also easy to work with, does not require a perfect surface to look good as a painted surface would need, repair jobs are easy since you don't have to take color tone in consideration to mention some of the advantages. Of course there are some draw backs also and one of the most obvious is that you have to apply several layers before you get a good surface witch is time consuming.

I started with the hull here one of the first layers of varnish is applied.


A back rest was made of 9 mm plywood. 


A desperate attempt to clean the garage before springboard and runner plank will get varnished. Dust is a problem when building in the same space as applying coating! For every layer of  varnish applied the amount of dust in the coating accumulates finally making the surface feel like sandpaper. One way to improve the surface despite the dust is to wet sand the surface before applying last layer of varnish. I used a 400 grit wet sand paper.   


Monday 8 February 2016

Springboard.

The springboard and what it needs to be able to do is a bit of a mystery to me.

As the name suggests I guess it should be able to take shocks when sailing on uneven ice. The following question is how stiff should the springboard be and how do you measure the stiffness? No idea at this point! The DN ice boat does not have a springboard it uses a spring between hull and front runner chock so I guess no help can be found from DN forums.

Another thing I'm wondering about is caster angle. Is it desirable to have a caster angle on the front runner steering shaft? And if so what should the angle be?  I think applying a caster angle could make the steering more "user friendly". The Ice boats I have sailed tend to have quite aggressive steering. I plan to steer my boat with feet only, no tiller.

Third issue is the length of the springboard. How does the length of the springboard affect the handling of the boat? The longer the springboard is the easier it should be to tip the boat over.

It's been a couple of days since I originally wrote the questions above and since then I have had some time to seek information and give the issues some thought. I came up with the following conclusions.

Bernd Stymer has described building a spring board of two 12mm planks glued together so that's what I'm going to do too! What ever stiffness I end up with after gluing the planks together is what I tend to use!

I have been seeking the internet for information about caster angle for iceboats. I only found one article about caster angle or tilted pivot angle as it was called. The article  mentioned a maximum value of four (4) degrees tilted pivot angle. The reason for the maximum value was a fear of front runner body hitting the front runner chock. I don't expect this to be a problem with the front runner chock I plan to build so I decided to aim for five (5) degrees caster angle! Why five degrees? Well I had the calculations ready from when making the rear runner plank and it was close to four degrees mentioned in the article...As good as any other guess!

The length of the plank I measured from the drawing in the building instructions!

Now that I have a plan it's time to start building the springboard. I had originally bought a 120 X 15 mm plank to use for building the springboard. Since my plan is now to use 12 mm plank I first had to get some help from a friend who owns a thickness planer to get the plank thickness corrected.

Preparing to glue the boards together.


The plank is glued up side down. In the right side of the picture you can see that I have tried to prepare the five degrees caster angle already at this stage. In this way I should be able to drill the hole for the steering shaft in a straight angle towards the springboard.


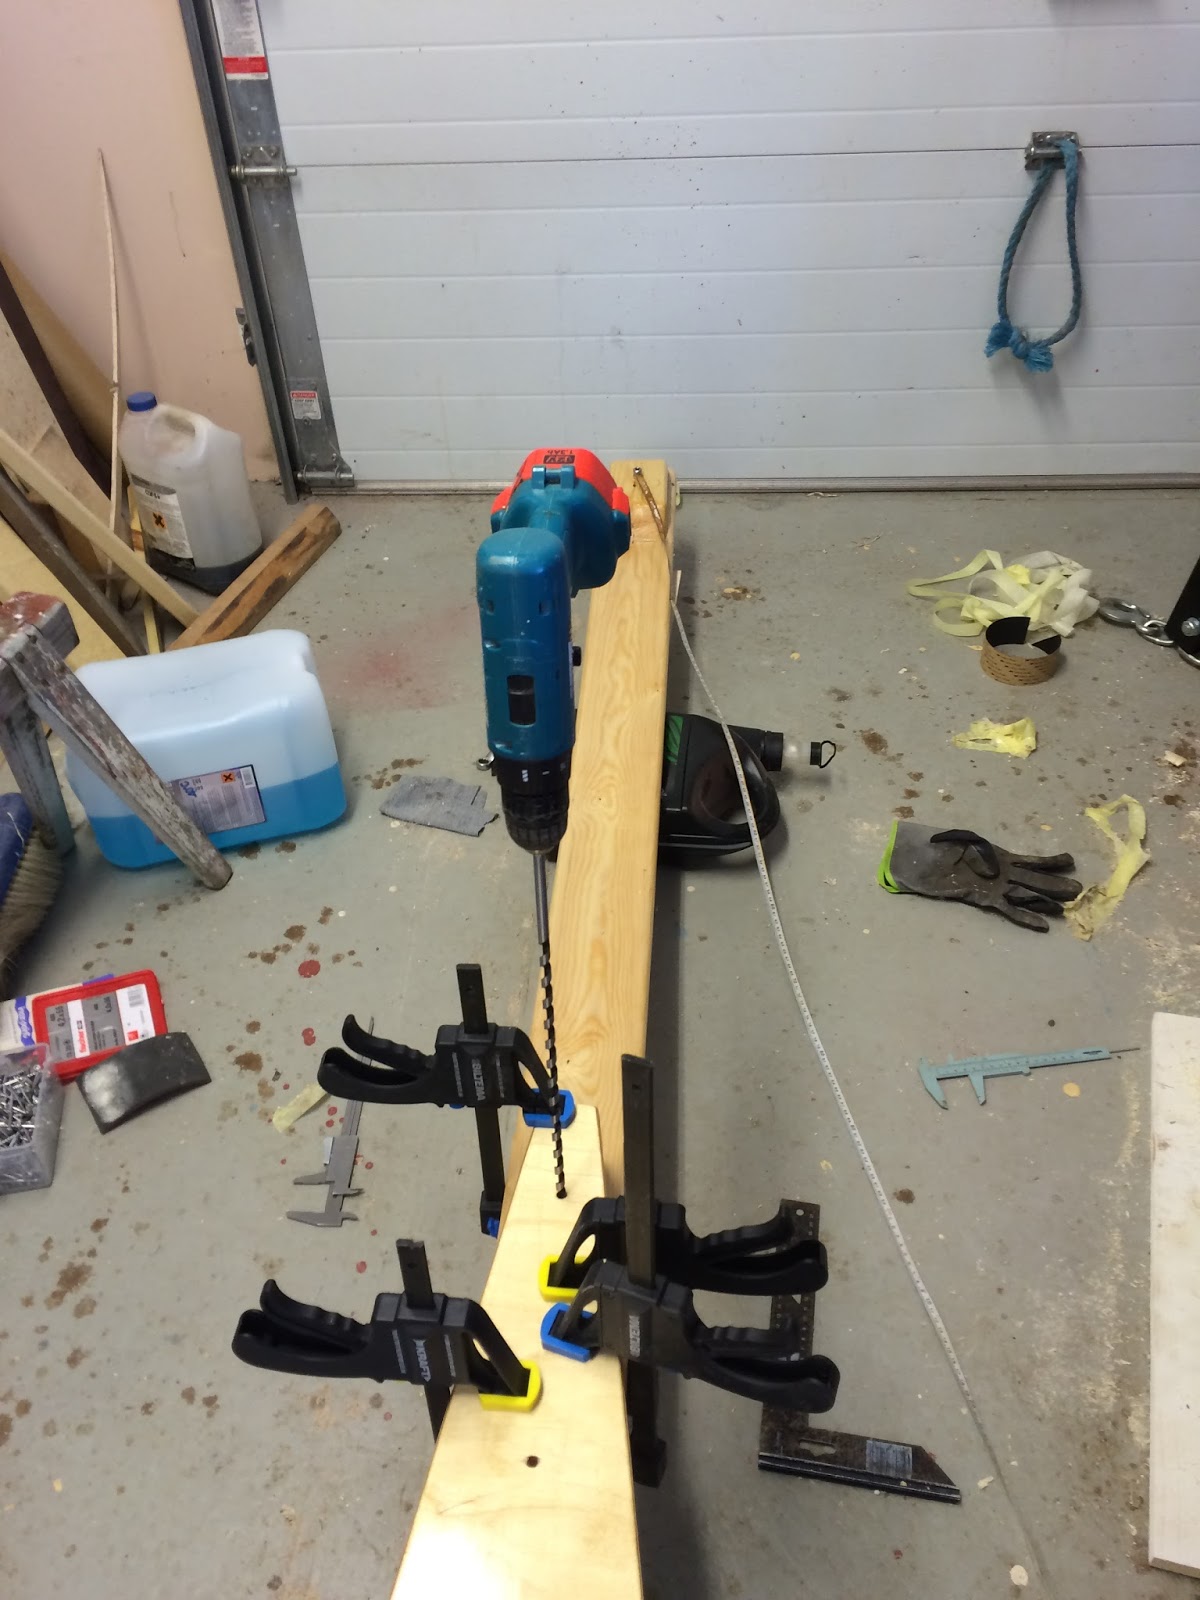
Drilling the hole for the steering shaft in a straight angle towards the reinforcement piece. Once the reinforcement piece has been glued in place I will drill the last bit true the spring board by hand.


Glue clamps removed. The plank bounced back quite a lot this time witch was expected since bending radius was small causing big tension when forcing the plank down in the gluing phase.


Trying to determine what the caster angle actually landed on.


Result about four (4) degrees!


Favorite tool used for making the sides of the spring board round.


The result.


Preparing to glue the reinforcement piece.


A lot of glue clamps for a small piece of wood!


Glue clamps removed and drilling the hole true the springboard. It would have been smarter to drill the entire hole in one go when the springboard was ready!


This piece under the springboard should not be needed but because of my experiment with the caster angle the board is slightly curved were the front runner chock will touch the spring board. I'm worried this might cause problems when steering! So I glue this additional piece in hope that the front runner chock will be able to turn freely.


Once the glue has dried the springboard is ready!